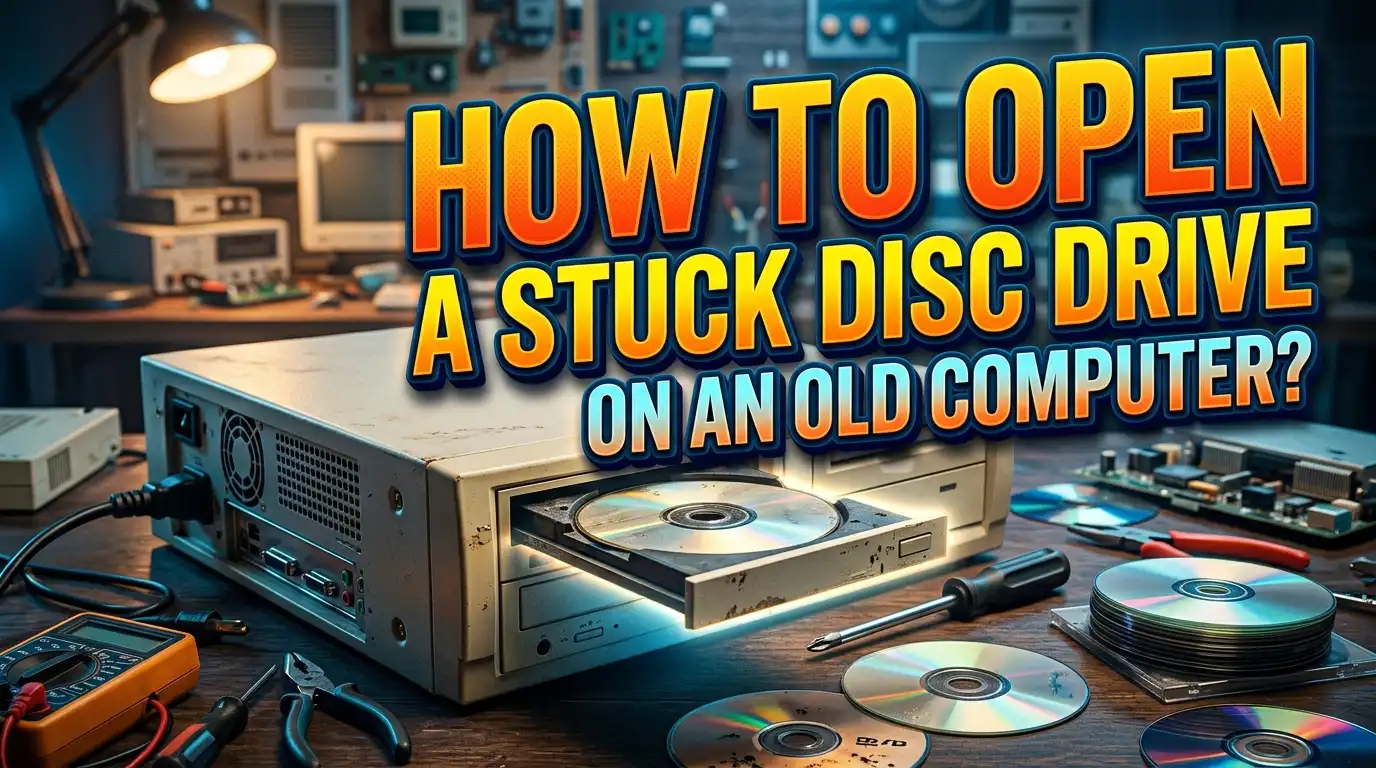
How To Open A Stuck Disc Drive On An Old Computer?
Few things are more frustrating than an old computer with a disc drive that simply refuses to open. You press the eject button. Nothing happens. You press it again. Still nothing.
Old CD and DVD drives get stuck for a variety of reasons. Dust buildup, worn rubber belts, software conflicts, and simple mechanical fatigue are all common culprits.
The good news is that there are multiple ways to tackle this issue, ranging from simple software commands you can run in seconds to hands-on mechanical fixes you can do at home.
This guide walks you through every method, step by step, from the easiest to the more advanced.
Key Takeaways
- The paperclip emergency eject method is the fastest and most reliable physical fix for a stuck disc drive tray on any old desktop or laptop computer. Every tray-load drive has a small pinhole designed for exactly this purpose.
- Software solutions come first — before touching anything physical, always try ejecting through File Explorer, the Command Prompt, or the Device Manager in Windows. These fixes take less than a minute and often solve the problem instantly.
- Dust and debris are the number one cause of stuck drives on old computers. Years of accumulated dust on the tray rails and motor mechanism prevent smooth movement, and a simple cleaning can restore full function.
- Worn rubber drive belts are a very common cause of stuck trays on older optical drives. The rubber belt that powers the tray motor stretches and loses grip over time, and replacing it is a low-cost repair that brings the drive back to life.
- Lubrication of the tray rails with a small amount of silicone grease or white lithium grease can fix a drive that opens slowly or gets stuck midway. Never use WD-40 on drive rails as it leaves a sticky residue that makes things worse over time.
- If all else fails, removing the drive from the computer chassis and manually turning the internal gear by hand gives you direct mechanical control to free the tray without any special tools.
Why Does A Disc Drive Get Stuck On An Old Computer?
Understanding the root cause of the problem helps you choose the right fix faster. Old optical drives fail to open for several distinct reasons, and each reason points to a specific solution.
The most common cause on old computers is a worn or stretched rubber drive belt. Inside every optical disc drive, a small rubber belt connects the motor to the gear mechanism that opens and closes the tray. Over years of use and exposure to heat, this rubber belt stretches, hardens, or develops a flat spot. When that happens, the motor spins but the tray does not move. You hear the motor working, but the tray stays shut.
Dust and debris buildup is the second most common cause. Old computers accumulate dust at an alarming rate, especially if they were used in dusty environments or were stored for years. Dust clogs the tray rail slots and creates friction that prevents smooth movement. In severe cases, a thick layer of debris can physically block the tray from sliding out.
A software or driver conflict is another very frequent cause. A background application such as a media player, disc burning software, or a virtual drive program can lock the optical drive and prevent it from ejecting. Windows itself can sometimes fail to communicate with the drive correctly, especially after system updates.
Physical damage or misalignment of the tray mechanism can also be the cause. If the computer was moved roughly, dropped, or had an object placed on top of it, the tray’s internal plastic gears or rails may have shifted out of alignment. This is less common but still worth considering when all other fixes fail.
Finally, old computers sometimes have outdated BIOS or firmware that causes the optical drive to behave erratically. A BIOS update can sometimes restore eject functionality when no other fix seems to work.
Gather What You Need Before You Start
Before you attempt any fix, it is smart to prepare your workspace and gather the items you might need. Having everything ready saves you time and prevents you from stopping in the middle of a repair.
For the basic methods, you will need a standard metal paperclip. This is the single most important tool for manually ejecting a stuck tray drive. Straighten out one end of the paperclip so you have at least 1.5 to 2 inches of straight metal to insert into the eject pinhole.
For cleaning the drive, you will need a can of compressed air and a soft, lint-free cloth. A cotton swab is also useful for reaching inside tighter spaces around the tray rails.
For lubrication, get a small tube of white lithium grease or silicone grease. Both are available at hardware stores. Avoid petroleum-based lubricants like WD-40 because they degrade rubber parts and leave oily residues that attract more dust over time.
If you plan to inspect the drive belt, you will need a small Phillips head screwdriver to open the drive casing. Replacement rubber belts for optical drives come in standard sizes, and you can find them at electronics parts stores.
Always power off your computer completely before performing any physical work on the drive. Unplug the power cable from the wall. This is a critical safety step that protects both you and the computer hardware.
Try The Software Eject Method First
The simplest solution is often the best one. Before you do anything physical, always try to eject the disc drive using software commands. This takes less than 30 seconds and works surprisingly often, even when the physical eject button fails.
On a Windows computer, press the Windows key + E to open File Explorer. Look in the left panel for “This PC” or “My Computer” and click it. You will see a list of drives connected to your computer. Find your CD or DVD drive in the list. Right-click on it and select “Eject” from the menu. Windows will send an eject signal directly to the drive hardware, which bypasses any button malfunction.
If File Explorer does not work, you can try the Command Prompt method. Click the Start menu and type “cmd” in the search box. Right-click Command Prompt and choose “Run as administrator.” In the command window, type the following and press Enter:
powershell (New-Object -ComObject WMPlayer.OCX.7).cdromCollection.Item(0).Eject()
This PowerShell command sends a direct eject signal to the first optical drive on your system. If your system has more than one optical drive, change the number in “Item(0)” to “Item(1)” to target the second drive.
You can also try ejecting from Disk Management. Press Windows key + X and click “Disk Management.” Find your optical drive in the list, right-click it, and look for an eject option. Some Windows versions display this option and some do not, but it is worth checking.
Close all media software before attempting a software eject. Programs like VLC, Windows Media Player, iTunes, or any disc burning software can hold a lock on the optical drive. Close every media application running in the background, including any icons in the system tray at the bottom right of your screen.
Restart The Computer And Try Again
This step sounds too simple to be useful, but it resolves a surprising number of stuck drive issues on old computers. A full restart clears all software processes that may be locking the drive, resets the drive controller hardware, and forces Windows to reinitialize the connection with the optical drive.
After the restart, try pressing the physical eject button on the drive before Windows fully loads. Press it right as the computer is powering on, during the BIOS screen. At this early stage, no software is running yet, which means no program can be locking the drive. If the tray pops open at this stage, a software conflict was causing the problem.
Some computers allow you to access the System BIOS and eject the optical drive from there. To do this, restart your computer and press the F2 key (or Delete key on some systems) repeatedly as it starts up. Once you are inside the BIOS settings screen, locate any option related to the optical drive and press the physical eject button on the drive itself. The BIOS environment isolates the drive from all operating system software, which helps confirm whether the issue is hardware or software-related.
If the drive ejects successfully from within BIOS, the problem is software-related. You can then focus your troubleshooting on driver updates, software conflicts, or Windows settings rather than mechanical fixes.
If the drive does not respond even from within the BIOS, the issue is most likely mechanical or hardware-based, and you will need to move on to the physical methods described in the sections that follow.
Use The Emergency Eject Pinhole With A Paperclip
Every tray-loading optical drive ever made includes a small emergency eject pinhole. This is a built-in manual override designed precisely for situations where the drive will not open by any other means. It is the most reliable physical method and should be one of your first go-to fixes.
First, power off your computer completely and unplug it from the wall socket. This is essential. You should never attempt the pinhole method while the computer is running because power surges can occur when a drive is manually forced open.
Look at the front panel of the disc drive. You will see the main tray door and the physical eject button. Somewhere on the face of the drive, usually directly below the eject button or slightly to one side, you will find a tiny round hole about 2mm in diameter. This is the emergency eject pinhole.
Straighten one end of a standard metal paperclip until you have at least 1.5 inches of straight wire. Hold the paperclip between your fingers and insert the straight end slowly and gently into the pinhole. Push it straight in, not at an angle. You will feel the wire make contact with a small internal release mechanism. Apply gentle, steady pressure.
The tray should pop out slightly — typically about half an inch. Do not force it. Once the tray has popped out a little, gently grip the tray edges with your fingers and pull it out slowly and evenly. If you feel strong resistance, stop and check for obstructions rather than forcing the tray open, as forcing it can break the plastic clips that hold the tray in place.
Once the tray is open and you have retrieved your disc, press the eject button once to tell the drive to close. If the drive closes and then fails to open again normally, move on to the deeper mechanical fixes described in later sections.
Check And Close Software That Locks The Drive
After a simple restart and the pinhole method, one of the most overlooked causes of a stuck disc drive is software interference. On old computers that have been used for years, many programs can accumulate that interfere with the optical drive’s eject function.
Open the Task Manager by pressing Ctrl + Shift + Esc. Look through the list of running processes for any media software. Programs like Nero Burning ROM, Roxio Creator, Alcohol 120%, Daemon Tools, PowerDVD, and even iTunes are notorious for placing a lock on the optical drive. End any of these processes by clicking on them and selecting “End Task.”
Virtual drive software is a particularly common culprit on old computers. Programs like Daemon Tools or Virtual CloneDrive create virtual disc drives in Windows, and these virtual drives sometimes interfere with the physical optical drive. Uninstalling virtual drive software completely can resolve eject failures that seem otherwise impossible to explain.
Check the system tray at the bottom right corner of your taskbar. Many background programs hide there. Right-click on any icons that look related to disc or media software and choose Close or Exit.
After closing all media software, press the physical eject button one more time. You will often find that the drive opens immediately once the locking software has been shut down. This fix works particularly well on old computers running Windows 7 or Windows 10 that have had many programs installed over the years.
If you find that a specific program keeps locking your drive, consider removing it from your startup programs list. Press Windows key + R, type “msconfig,” click the Startup tab, and disable any media programs you do not need to launch at boot.
Update Or Reinstall The Optical Drive Driver
A corrupted or outdated driver is a common cause of disc drive problems on older computers, especially those running Windows 10 or Windows 11 after a major system update. Reinstalling the driver gives Windows a fresh connection to the drive hardware and can restore eject functionality very quickly.
Press the Windows key + X and select “Device Manager” from the menu. In the Device Manager window, look for a category labeled “DVD/CD-ROM drives” and click the arrow next to it to expand the list. You will see your optical drive listed by its model name.
Right-click on the optical drive name and select “Uninstall device.” A confirmation window will appear. Do not check the box that says “Delete the driver software for this device.” Just click Uninstall. This removes the current driver from Windows without deleting the core driver files.
Once the uninstall is complete, restart your computer. Windows will automatically detect the optical drive during startup and reinstall its driver fresh. This process takes only a minute or two. After the restart, open File Explorer and check if your drive appears again. Try pressing the eject button or using the right-click Eject option in File Explorer.
If Windows does not automatically reinstall the driver, you can right-click on an empty area inside Device Manager and select “Scan for hardware changes.” This forces Windows to search for and reinstall any missing hardware drivers, including the optical drive.
On older computers that came with manufacturer-specific driver software, visit the computer manufacturer’s website and search for the latest optical drive drivers specific to your model. Dell, HP, and Lenovo all offer support pages where you can download driver updates by entering your computer’s model number.
Clean Dust And Debris From The Drive Tray
Dust is one of the biggest enemies of optical drives, especially on old computers that have been running for five or more years. A thick layer of dust on the tray rails creates friction that can jam the tray completely.
Start by using a can of compressed air to blow air into the front opening of the drive tray. Hold the can upright and use short bursts. Do not tilt the can sideways or upside down, as this releases liquid propellant that can damage the drive mechanism. Aim the air nozzle at the edges of the tray slot where dust accumulates most.
If the tray is partially open, use a dry cotton swab to gently wipe along the visible tray rails. The rails are the two small metal or plastic tracks that the tray slides along. Remove any visible dust, lint, or debris that is clinging to these surfaces.
For a more thorough cleaning, remove the drive from the computer chassis (detailed steps are in the next section) and open the top panel of the drive. Inside, you will see the tray rail assembly clearly. Use compressed air and a soft lint-free cloth to clean every surface. Be particularly careful around the laser lens assembly — never touch the laser lens with your fingers or a dry cloth, as even a fingerprint can interfere with its function.
After cleaning, check if the drive tray moves more freely by hand. If it slides smoothly with no resistance, dust was the primary cause of the jam. Reinstall the drive, reconnect it to the computer, and test the eject button. In most cases, a clean drive opens and closes perfectly again.
Cleaning the drive every six months is a good maintenance habit that prevents future jams on old computers. Keep the computer off the floor where dust levels are highest, and consider using a small desk fan nearby to improve airflow around the case.
Lubricate The Tray Rails To Restore Smooth Movement
After cleaning, if the drive tray still moves stiffly or gets stuck halfway, the problem may be dried-out or missing lubrication on the rails. Optical drive trays rely on a small amount of lubricant on their sliding rails to move smoothly. On old drives, this lubricant dries out, becomes sticky, or collects dust and turns into a paste that creates friction.
Remove the drive from the computer and open its cover by removing the four screws on the bottom and sides of the drive casing. Once inside, locate the two metal or plastic tray rails on each side of the disc tray mechanism. You may also see a center track or guide rail depending on the drive model.
Use a cotton swab or a toothpick to apply a tiny amount of white lithium grease or silicone grease along the length of each rail. A small pea-sized amount spread evenly is more than sufficient. You only need a very thin coating — too much lubricant attracts dust and makes things worse over time.
Avoid using petroleum jelly (Vaseline) on drives that will be used regularly because it softens and migrates into other parts of the mechanism over time. WD-40 should be completely avoided on optical drive rail systems. While WD-40 is a great penetrating oil for loosening rusted metal, it dries into a sticky film on plastic and rubber surfaces, which are common inside disc drives.
After applying the lubricant, manually slide the tray in and out several times by hand to spread the grease evenly across the rail surfaces. The tray should now move with much less resistance. Reassemble the drive, reinstall it in the computer, and test it. Properly lubricated rail systems can extend the life of an old optical drive by several more years.
Inspect And Replace The Rubber Drive Belt
If the drive makes a noise when you press eject — you hear the motor running — but the tray does not move at all, a worn rubber drive belt is almost certainly the cause. This is one of the most common mechanical failures on optical drives that are five or more years old.
To access the drive belt, remove the disc drive from the computer and unscrew the drive casing. With the cover off, look for a small rectangular or square rubber belt connecting the drive motor’s spindle to one of the plastic gear wheels. This belt is typically 2 to 5 cm long depending on the drive model.
Gently lift the old belt off the spindle and the gear using a toothpick or the tip of a ballpoint pen. Examine it closely. A worn belt will appear stretched, flat on one side, shiny, or cracked. Even a belt that looks intact visually may have lost its elasticity and can no longer grip the spindle tightly enough to drive the tray.
Replacement rubber belts for optical drives come in standard sizes and are sold as small assorted packs at electronics parts stores. Match the length and width as closely as possible to the original belt. A belt that is slightly shorter is better than one that is too long — a slightly tighter fit ensures better grip on the motor spindle.
Stretch the new belt gently over the motor spindle first, then loop it over the gear wheel. Make sure it sits flat and centered on both surfaces. Do not get any oil or grease on the belt itself, only on the rail surfaces. Grease on the belt causes it to slip rather than grip.
Reassemble the drive, reinstall it in the computer, and test the eject function. In a large majority of cases where the motor was running but the tray was not moving, replacing the drive belt completely solves the problem.
Remove The Drive From The Computer For Manual Access
Sometimes, the best approach is to remove the optical drive from the computer entirely to work on it more freely. This is especially useful on desktop computers where the drive is easily accessible after removing a side panel.
Power off and unplug the computer. Remove the side panel of the desktop case by unscrewing the two or three screws at the back of the panel. On most standard desktop cases, the panel slides backward and then lifts off.
Look inside and find the optical drive. It is typically mounted in a 5.25-inch bay near the top front of the case. You will see a data cable (SATA or IDE) and a power cable plugged into the back of the drive. Disconnect both cables by pulling them straight back gently.
Next, remove the screws on the sides of the drive that secure it to the case. Most drives are held by two screws on each side, though some cases use tool-less clip systems. Once the screws are removed, slide the drive toward the front of the case and pull it out through the front bay opening.
With the drive in your hands and fully outside the computer, you can try the pinhole eject method more easily. You can also manually turn the large plastic gear wheel visible through the bottom vents of the drive to slowly advance the tray outward. Rotate the gear gently in the direction that seems to move the tray forward. This method gives you direct mechanical access to the tray mechanism without any disassembly tools.
After retrieving your disc and performing any cleaning or belt replacement, slide the drive back into the bay, reconnect both cables, replace the side panel, and power the computer back on.
Try The Disc Drive On Another Computer Or Test A Replacement
After trying all the software and mechanical fixes above, if the disc drive still refuses to open or behaves unpredictably, it is worth testing the drive on another computer to determine whether the drive itself is faulty or whether the issue lies with the original computer’s connections or power supply.
Remove the drive as described in the previous section. Connect it to another desktop computer using a spare SATA data cable and a SATA power connection. Power on the second computer and see if the drive opens normally. If the drive functions perfectly on a different computer, the problem is with your original computer’s BIOS settings, power connection, or data cable.
Check the SATA or IDE data cable connecting the drive to the motherboard. Old cables develop small internal breaks that are invisible from the outside. Swap the data cable for a known-good replacement and test again. Also check the power connector for any signs of burnt plastic or corrosion.
On some very old computers using an IDE interface, incorrect jumper settings on the back of the drive can cause communication failures. The drive must be jumpered correctly as either Master or Slave depending on how it is connected. Look at the label on the drive for a jumper diagram and compare it to your actual jumper setting.
If the drive is faulty even on a second computer, it may be time to accept that the drive has reached the end of its lifespan. Optical drives are not expensive to replace, and they are simple to install. Many old IDE and SATA optical drives are still available from used electronics stores, and installing a replacement takes only a few minutes.
Prevent Your Disc Drive From Getting Stuck Again
Once your disc drive is back in working order, a few simple habits will keep it running smoothly for years to come. Prevention is always easier than repair, and old computers especially benefit from regular attention and maintenance.
Keep the drive tray closed when it is not in use. Many people leave their disc tray open for extended periods, which allows dust to settle directly onto the rails and laser lens. A closed tray keeps the internal mechanism protected.
Clean your computer’s interior with compressed air at least once every six months. Pay special attention to the drive bay area where dust accumulates around the tray opening. You do not need to open the drive casing for routine cleaning — a few short blasts of compressed air through the tray slot is sufficient.
Avoid storing your computer on the floor or in dusty environments. Computers sitting on carpeted floors draw in far more dust through their intake vents than computers placed on desks. Elevated placement significantly reduces dust accumulation inside the case.
Do not press the eject button repeatedly in quick succession. Every time you press the button while the motor is running, you put additional stress on the drive belt and tray mechanism. Press the button once and give the drive three to five seconds to respond before pressing it again.
Remove discs from the drive when they are not needed. A disc spinning inside a drive for hours at a time generates heat and puts continuous wear on the motor bearings and belt. Eject the disc as soon as you are done using it.
Finally, consider keeping a few basic supplies on hand — a spare rubber belt in the right size, a small tube of silicone grease, and a can of compressed air. With these three items, you can handle the vast majority of optical drive maintenance tasks yourself without calling a technician.
When To Consider Replacing The Disc Drive
Even after trying every method in this guide, some optical drives on old computers are simply too worn out to be worth repairing. Knowing when to stop and replace the drive saves you time and frustration.
If the plastic tray mechanism has broken clips or cracked rails, manual repair becomes difficult because replacement parts for specific drive models are often unavailable. Broken plastic inside the drive causes the tray to jam at inconsistent points, and no amount of lubrication or belt replacement will fix a structurally cracked housing.
If the drive motor makes a grinding noise rather than a smooth humming sound, the motor bearings have likely worn out. Motor replacement is a specialized repair that is rarely worth the effort on an old optical drive that originally cost between fifteen and forty dollars.
If the drive opens but consistently fails to read any disc, including discs that are known to be in perfect condition, the laser lens may be failing. At this stage, the drive has multiple simultaneous problems that together indicate end-of-life rather than a single fixable issue.
Replacement optical drives are inexpensive and widely available. A SATA DVD drive for a desktop computer is a simple plug-and-play replacement. Laptop optical drives are slightly more specific to the model but are still straightforward to replace with minimal tools. Sometimes, moving on to a replacement is the most practical and time-efficient choice, especially when the old drive has been unreliable for months.
Frequently Asked Questions
Why won’t my disc drive open even after pressing the eject button multiple times?
Pressing the eject button repeatedly does not help and can actually stress the drive mechanism further. The most likely causes are a software lock from a running media program, a worn rubber drive belt, dust buildup on the tray rails, or a driver conflict in Windows. Start by closing all media software and trying the right-click Eject option in File Explorer before moving to physical fixes like the paperclip pinhole method.
Is it safe to use a paperclip to open a stuck disc drive?
Yes, it is completely safe when done correctly. Every tray-loading optical drive has a built-in emergency eject pinhole for exactly this purpose. Use a straightened standard metal paperclip, insert the straight end gently into the pinhole, and apply light steady pressure. The key is to power off the computer first and to not force the tray if you feel strong resistance.
Can I use WD-40 to fix a stuck disc drive?
No. WD-40 is not suitable for optical drive tray rails. It is a penetrating oil designed for loosening rust, and when it dries it leaves a sticky residue that attracts dust and can gum up the rail mechanism further. Use white lithium grease or silicone grease instead. These lubricants stay clean, do not attract dust, and are safe for plastic and rubber components.
How do I know if the rubber drive belt is the problem?
If you press the eject button and hear the motor running (a soft whirring or humming sound) but the tray does not move at all, a worn or broken drive belt is almost certainly the cause. Open the drive casing, locate the small rubber belt connecting the motor spindle to the gear wheel, and inspect it. A stretched, cracked, shiny, or flat belt needs replacement.
My disc drive worked fine yesterday. Why is it stuck today?
Sudden failures are often caused by software. A Windows update, a newly installed program, or a background process that started overnight can lock the optical drive and prevent it from ejecting. Restart the computer, close all media software, and try ejecting through File Explorer. If the drive opens after a restart, a software conflict was the culprit.
Can a stuck disc drive damage my disc?
In most cases, a disc sitting inside a stuck drive is not damaged. The disc only spins when the drive is actively reading it. As long as you do not force the tray open violently or damage the disc during extraction, your disc should be in the same condition as when you inserted it.
Should I replace my optical drive or try to fix it?
Try the fixes in this guide first, starting with the simplest software methods and moving to mechanical fixes. If the drive has broken plastic components, a failed motor, or consistently fails to read discs even after cleaning, replacement is the more practical option. Optical drives are inexpensive and simple to replace, making them one of the most cost-effective computer hardware upgrades on old machines.
Hi, I’m Lusi. I’m a tech enthusiast who loves digging into gadgets, testing products, and helping people find the best tech for their needs and budget. Got a question or a product you’d like me to review? Drop me a mail— I’d love to hear from you!